


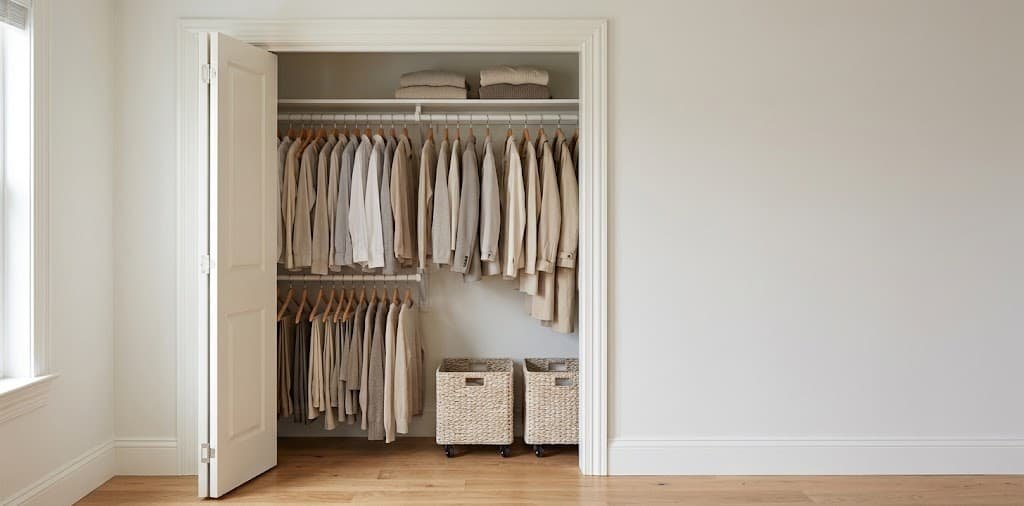
Most small closets are not actually short on space — they are short on usable vertical space, because a standard closet build gives you exactly one rod and one shelf, which wastes the roughly four feet of air sitting above that shelf and the eighteen inches of dead space below the hanging clothes. A renovation fixes this by rebuilding the whole interior. A well-planned system fixes the same problem for a fraction of the cost, in an afternoon, with nothing that requires a contractor.
This is a full reorganization built around adding usable levels to a closet that currently has two, using hardware you install yourself and nothing that requires cutting into drywall beyond standard screws into studs. The whole project fits into one afternoon, start to finish, including the shopping trip for hardware.
Why This System Actually Works
A standard closet wastes space in three predictable places: the empty air above the single shelf, the gap between the floor and the bottom of hanging clothes, and the back corners, which are technically accessible but functionally invisible once anything is stacked in front of them.
The fix is not more storage bins — it is more levels. A second rod hung below the existing one, positioned for shorter items like shirts and folded pants, roughly doubles hanging capacity in the same footprint. A shelf added above the existing one captures the wasted air at the top for items you access rarely — out-of-season clothing, spare bedding — where infrequent access is actually fine. Floor-level bins on casters solve the bottom eighteen inches without requiring you to bend down and dig, since they roll out into the room.
None of this requires removing the existing closet rod or shelf. It requires adding to what is already there, which is why it takes an afternoon rather than a weekend. The existing hardware stays exactly where it is — everything below simply builds on top of what your closet already has.
What You’ll Need
- A stud finder — genuinely necessary, not optional. Anything mounted to drywall alone without hitting a stud will fail under the weight of hung clothes within weeks.
- A second closet rod and the brackets to mount it, sized to your closet’s width. Adjustable telephoning rods work in closets without easy stud access, since they wedge between the side walls under tension rather than requiring wall anchors.
- One or two wire or wood shelves for the space above the existing shelf, plus brackets rated for the weight you intend to store — sweaters and folded items are heavier than most people estimate, and a bracket rated for 20 pounds sags under a stack of winter sweaters within a month.
- Two to three underbed or floor bins with wheels, sized to fit the width of your closet floor with an inch of clearance on each side.
- A tape measure, a level, a drill, and screws long enough to reach at least 1.5 inches into a stud once through the drywall.
Total cost for a basic version of this system typically runs meaningfully less than a single closet organizer kit sold as a unit, since you are buying only the specific pieces this closet actually needs rather than a fixed configuration designed for an average closet dimension your closet likely does not match exactly.
How to Do It, Step by Step
- Empty the closet completely and vacuum the floor and shelf. You cannot accurately measure or plan around clutter, and this is the only point in the process where the closet is fully accessible.
- Measure the full height, width, and depth of the closet, and note the height of your longest hanging items — coats and dresses — since this determines where the second rod can go without the two levels colliding.
- Find and mark the studs using the stud finder, running the line across the back wall and both side walls where you plan to mount anything. Standard construction spaces studs 16 inches apart, so once you find one, the rest are predictable.
- Install the upper shelf first, roughly 12 to 14 inches above the existing shelf — enough clearance to stack folded items without them touching the shelf above. Mount brackets directly into marked studs, level, then set the shelf on top.
- Install the second rod beneath the first, positioned so the bottom of shorter hanging items — folded-over pants, shirts — clears the floor by at least 2 inches. Measure your specific shorter garments rather than guessing, since this gap is the most common measurement error in the whole project.
- Place the rolling bins along the closet floor, positioned to slide out from under the lowest hanging rod without catching on hems. Test this by pulling each bin fully out before deciding on final placement.
- Reload the closet by category and frequency, not randomly. Rarely worn items go on the top shelf. Currently worn seasonal items go on the two rods. Off-season or bulky items go in the rolling bins.
The One Thing That Actually Makes This Work
Sorting by how often you actually wear something, not by category or color, is what determines whether this system holds up after the first month.
A closet organized by category alone — all shirts together, all pants together — looks tidy on day one and drifts back to chaos within weeks, because the shirt you wear three times a week and the shirt you wore once two years ago are treated identically, given equal prime real estate on the main rod. Sorting by frequency instead means the clothes you actually reach for daily live at eye level on the primary rod, and everything else moves to the top shelf or the bins specifically because you touch it rarely enough that the extra step of reaching or pulling out a bin costs you nothing.
This is also why the system stays organized without ongoing effort: putting something back in the wrong place is immediately obvious, because the daily rod is visually distinct from the rarely-worn shelf, in a way that shirts-with-shirts and pants-with-pants never signals when something is misplaced.
Practical Tips
Use matching hangers throughout, even inexpensive ones. Mismatched hanger widths and shapes are one of the most common reasons a genuinely well-organized closet still looks cluttered — uniform hangers create a visual consistency that makes the whole space read as organized even when it is fairly full.
Label the rolling bins on the end facing outward, not the top, since you will be reading the label while the bin is still under the rod, not from above.
Leave roughly 20 percent of the primary rod empty rather than filling it completely. A rod packed edge to edge makes every single item harder to see and reach, and that friction is what causes people to default to the same five outfits and let the rest of the closet go unused.
Mistakes to Watch Out For
Mounting the second rod or upper shelf into drywall alone, without hitting studs, is the most common and most consequential mistake — drywall anchors rated for hanging a picture are not rated for the ongoing weight of a loaded clothing rod, and failure here is not a question of if but when.
Buying a fixed-configuration closet kit before measuring your specific closet is the second common mistake — these kits are built around average dimensions, and a closet even slightly narrower or shallower than average leaves you with pieces that do not fit and a return process for the leftover hardware.
Skipping the frequency-sort in favor of a purely categorical one, covered in Section 5, is the third — it produces a closet that photographs well on day one and reverts to a pile within a month, since the system was never actually built around real daily use.
Budget Breakdown
Budget tier: A single adjustable tension rod plus two stackable floor bins, using the existing shelf as-is. This addresses hanging capacity and floor storage without touching the walls at all, and it is reversible in minutes if you move.
Mid-range tier: The full system described above — a permanently mounted second rod, one added upper shelf, and two to three rolling bins. This is the version most small closets benefit from most, balancing real capacity increase against a single afternoon of installation. It is also the tier where the frequency-sorting principle from Section 5 has enough physical space to actually matter.
Higher-investment tier: Adds a second upper shelf, built-in drawer units sized to the closet’s specific footprint, and closet-door-mounted storage for shoes or accessories. Worth it specifically for a closet serving as the only storage in a small bedroom, where maximizing every inch has real daily impact.
Adjusting It for Your Closet
In a reach-in closet with no side access, position the second rod and rolling bins toward the front two-thirds of the depth, since the back third of a deep reach-in closet becomes genuinely difficult to access once two rods are in use, and reserving it for the least-frequently-touched items avoids that friction entirely.
In a shallow closet under 24 inches deep, skip the second rod entirely and prioritize the upper shelf and rolling bins instead — a second rod in a shallow closet often leaves too little clearance for hangers to move freely, which defeats the purpose of adding it.
In a shared closet, assign each person a clearly defined vertical section — one person’s frequency-sorted zone stacked above the other’s — rather than mixing frequency sorting across both people’s belongings, since “frequently worn” means something different for each person and a shared unsorted system reverts to chaos faster than a single-person one.
Keeping It Organized
Do a five-minute reset every two weeks — moving anything that has shifted rod or shelf back to its designated zone — rather than waiting for a full reorganization once things have visibly drifted. Small resets take five minutes; full reorganizations take an afternoon, and the gap between those two costs is the entire argument for doing the small one regularly.
Reassess the frequency sort each season, since what you wear daily genuinely shifts, and a system sorted for summer clothes in January defeats its own purpose until it gets updated.
Where to Start
The honest case for this system is narrow and specific: adding one rod and one shelf roughly doubles usable storage in the exact footprint you already have, without a renovation, a contractor, or a full weekend.
Empty the closet this weekend, find your studs, and measure before you buy anything. Those three steps, done in order, prevent the two most common and most expensive mistakes in this entire project.