

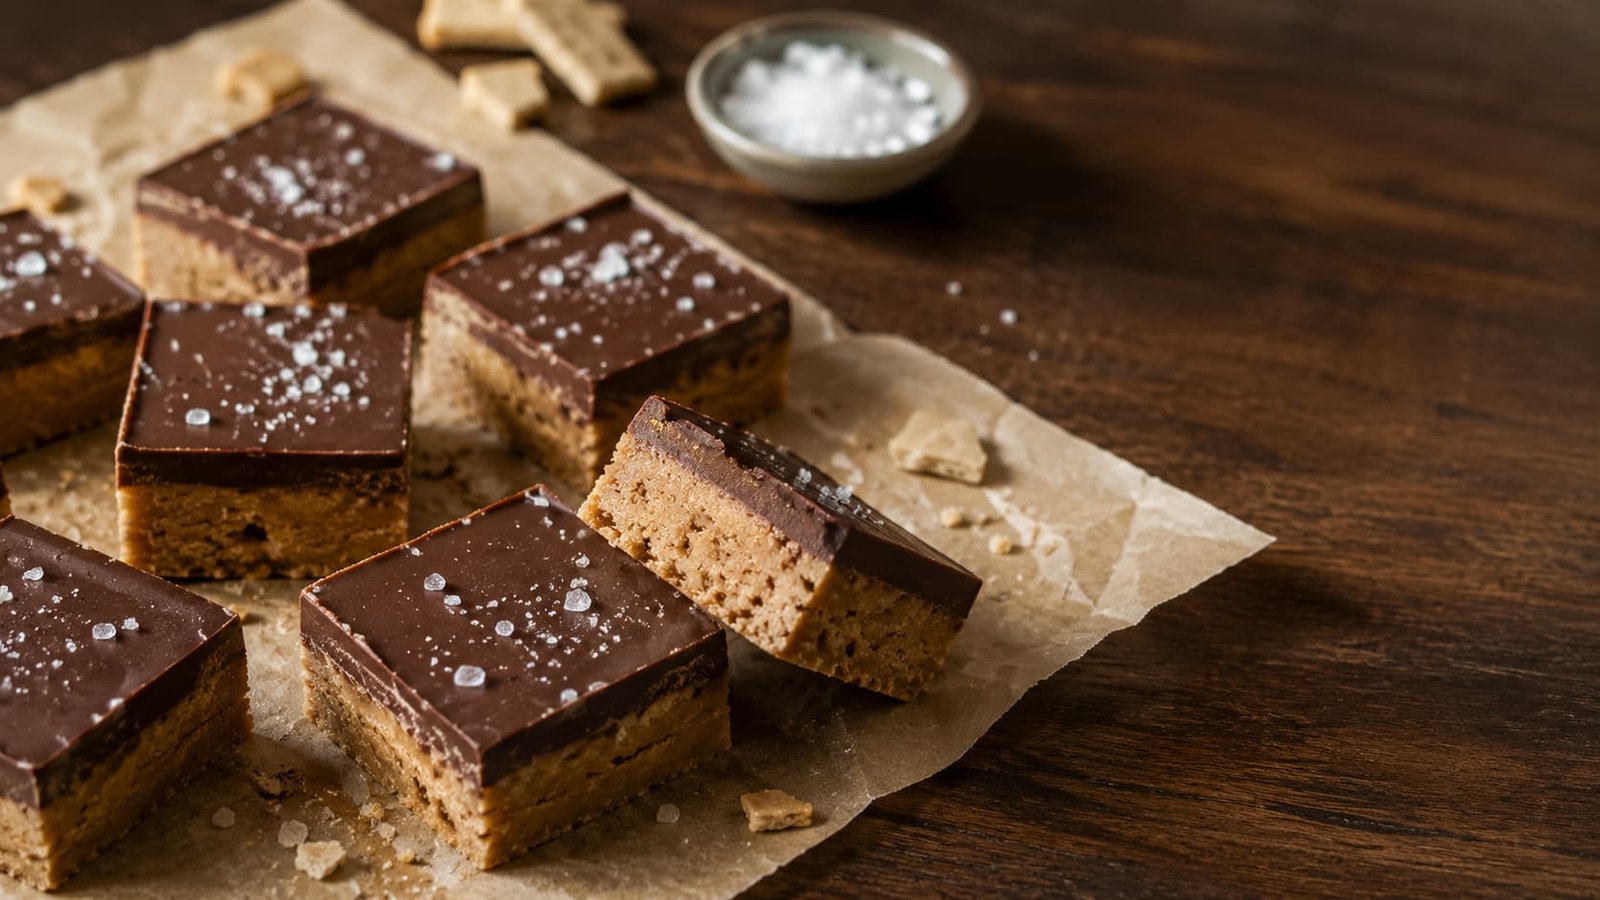
The test of these bars is the first cut. Through a properly made pan the knife goes clean — the chocolate parts in a straight line, the peanut butter layer holds its edge, and the square lifts out with two distinct strata. Through a badly made pan the chocolate shatters into shards while the base squashes beneath it, and every piece looks pried loose rather than cut.
That difference is not about care or knife skill. It comes down to two tablespoons of coconut oil whisked into the chocolate and the moment you choose to score the top layer. Both are covered below, and together they are the reason these bars look like they came from a case rather than from a pan.
What is under the chocolate is a dense, fudgy peanut butter layer with the faint sandiness of graham crumbs — sweet, salted, and closer in texture to the inside of a peanut butter cup than to a cookie. No oven, no thermometer, twenty minutes of work and an hour in the refrigerator.
| Prep Time | Chill Time | Total Time | Makes |
|---|---|---|---|
| 20 minutes | 1 hour | 1 hour 20 min | 16 bars |
Why These Set Correctly
The base holds together through fat crystallization, not baking. Melted butter coats every particle of powdered sugar and graham crumb, and chilling recrystallizes that butter into a matrix binding the whole layer. This is why the butter must be fully melted, not softened — softened butter stays in discrete lumps that never form a continuous network, and the base crumbles under a knife.
The powdered sugar is doing structural work beyond sweetening. Commercial confectioners’ sugar contains roughly 3 percent cornstarch as an anti-caking agent, and that starch absorbs moisture from the peanut butter, firming the layer. Granulated sugar has no starch and does not dissolve at room temperature, so a base made with it stays gritty and loose. This substitution fails and it fails badly.
The chocolate layer is the part most recipes get wrong. Pure chocolate sets to a hardness that far exceeds the peanut butter beneath it, and when the knife hits that mismatch, the brittle layer fractures rather than parting. Adding 2 tablespoons of coconut oil to 8 ounces of chocolate lowers the set hardness enough that the two layers yield at similar pressure — coconut oil is roughly 90 percent saturated fat and solid below 76°F, so it firms up properly while staying softer than cocoa butter alone.
Ingredients
For the peanut butter base:
- 1 cup conventional creamy peanut butter (Jif or Skippy style, not natural) — The one place I would tell you to skip the better ingredient. Natural peanut butter is only peanuts and salt, so nothing holds its oil in suspension: it separates during chilling, leaves a greasy layer at the bottom of the pan, and the bars never firm properly. Conventional peanut butter carries a small amount of hydrogenated oil specifically to prevent that, and it is why these set. If natural is all you have, stir it thoroughly and add 2 extra tablespoons of powdered sugar.
- ½ cup unsalted butter, melted and slightly cooled — Melt it fully. Warm, not hot; butter above about 120°F will start dissolving the sugar rather than coating it.
- 1½ cups powdered sugar, sifted if it has been sitting in the cupboard and has lumps
- 1 cup graham cracker crumbs (about 8 full sheets, crushed) — Crush them to the texture of coarse sand with a few larger fragments. Crumbs pulverized to flour give you a pasty base; crumbs left too chunky create fault lines where the layer breaks.
- ¾ teaspoon fine sea salt — Not optional, and more than most recipes call for. This is a very sweet dessert and salt is what keeps it from being flat.
- 1 teaspoon vanilla extract
For the chocolate layer:
- 8 ounces semisweet chocolate (about 60% cacao), chopped — Bar chocolate, not chips. Chips carry less cocoa butter and added stabilizers so they hold shape in a hot oven — the opposite of what you want. Melted chips set matte, waxy, and harder to cut; chopped bar chocolate sets glossy and yields cleanly.
- 2 tablespoons refined coconut oil — Refined rather than virgin, unless you want the bars to taste of coconut. Refined coconut oil is flavorless and behaves identically. Unsalted butter substitutes at the same quantity and gives a slightly softer set with a richer flavor; I prefer coconut oil for the cleaner snap.
- Flaky sea salt for finishing — About ½ teaspoon scattered across the top. Flaky, not fine — you want distinct crystals that register individually against the chocolate.
How to Make Them
- Line an 8-by-8-inch pan with parchment, leaving a two-inch overhang on opposite sides. That overhang is the sling that lifts the slab out later — cutting in the pan is how corners get mangled. An 8-inch pan gives bars about ¾ inch thick; a 9-by-13 gives thinner bars with no other adjustment.
- Whisk the melted butter, peanut butter, vanilla, and fine salt together until completely smooth and slightly glossy, about 45 seconds. The mixture should look like thin caramel and fall from the whisk in a ribbon.
- Add the powdered sugar and graham crumbs and fold with a spatula until just combined. It will go from loose to stiff quickly, and it will look like wet sand that holds its shape when pressed. Stop as soon as no dry sugar is visible. Continued mixing works the butter out of suspension and the base turns oily.
- Press the mixture into the pan and compact it firmly with the flat bottom of a drinking glass, working from the center outward. Press hard — you should see the surface go from textured to smooth and slightly shiny under the glass. Air pockets left in the base become the places where bars snap apart later.
- Chill the base for 15 minutes. This matters: warm chocolate poured onto a soft base sinks into it and you lose the clean line between layers.
- Melt the chocolate and coconut oil together in 20-second bursts in the microwave, stirring between each, until about 80 percent melted. Then stop and stir until the last pieces disappear from residual heat. Chocolate scorches above roughly 115°F and becomes grainy and dull — pulling it early and stirring it out is the reliable way to avoid that.
- Pour the chocolate over the chilled base and tilt the pan to spread it, rather than pushing it with a spatula. Tilting gives a smooth, even surface; spatula marks stay visible after setting. Tap the pan once firmly on the counter to release trapped bubbles.
- Scatter the flaky salt across the top while the chocolate is still wet, within the first two minutes. Salt added after the surface begins to set sits on top and falls off when you cut.
- Refrigerate 20 to 25 minutes, then score the chocolate. This is the step that determines whether the bars cut cleanly, and it is the one almost every recipe omits — see the next section for exactly what to look for.
- Return to the refrigerator for 35 to 40 more minutes, until fully firm. Lift the slab out by the parchment sling, set it on a board, and cut through the scored lines.
The Technique That Makes the Cut Clean
Everything else here is assembly. Scoring the chocolate at partial set is the skill, and it is worth understanding precisely because the window is narrow and unmarked.
The right moment is when the chocolate has lost its wet shine for a matte finish, but a fingertip at the edge still leaves a faint impression without breaking the surface. In a 38°F refrigerator that arrives at 20 to 25 minutes: the cocoa butter has begun crystallizing but has not reached full hardness, so a knife parts it rather than cracking it.
Use a thin, sharp knife and press straight down — do not drag. Dragging a blade sideways through setting chocolate tears it and leaves a ragged, whitened edge. Press down through the chocolate layer only, about ⅛ inch deep. You are not cutting the base yet; you are creating a fracture line for the chocolate to follow later.
Wipe the blade between every cut. Chocolate accumulating on the knife transfers back onto the surface and leaves smears that are visible on the finished bars.
Miss the window and the chocolate goes fully hard — set the pan on the counter 10 to 12 minutes, then score. Do not run the knife under hot water: the standard cake-cutting advice fails here, since water on the blade leaves dull streaks on the chocolate.
Smaller Decisions Worth Making
Use a metal pan rather than glass or ceramic. Metal conducts heat away roughly four times faster and both layers set more evenly; a glass pan chills from the edges inward, leaving the center soft while the perimeter is firm.
Crush the graham crackers in a zip-top bag with a rolling pin, not a food processor. The processor takes them to flour in about four seconds with no stopping partway, and the contrast from slightly uneven crumbs is most of what separates this base from plain fudge.
Make the base up to two days ahead, covered in the refrigerator, and add the chocolate the day you serve — the chocolate is what degrades here, not the base.
Weigh the peanut butter if you have a scale: 1 cup is 258 grams. A cup measure can be off by 30 grams depending on how hard you packed it, and that swing changes how firm the base sets. And let the melted butter cool three or four minutes before it meets the peanut butter — straight off the heat it thins the mixture too far.
Common Mistakes and How to Avoid Them
The chocolate cracks and shatters when cut. Either the coconut oil was omitted, or the slab was cut cold from full set without scoring. Both are covered above, and the fix is preventive rather than corrective — a fractured top layer cannot be repaired.
The base is greasy or oil pools at the bottom. Natural peanut butter, or overmixing after the sugar went in. Stir natural peanut butter thoroughly before measuring, and stop folding the instant the dry sugar disappears.
The base is crumbly and will not hold together. The butter was softened rather than melted, or there was too little of it. A full ½ cup, fully liquid, forms the binding matrix.
White or grey streaks on the chocolate after a day. Fat bloom — cocoa butter migrating to the surface and recrystallizing after temperature swings. Harmless and it tastes fine, but it looks poor. Keep the pan at a steady temperature rather than moving it in and out.
The bars are cloyingly sweet. The salt was reduced or skipped. Three-quarters of a teaspoon in the base plus flaky salt on top reads as balanced, not salty, and it is the single correction that most improves a version that tastes one-note.
The layers separate when you bite in. The chocolate went onto a base that had not chilled, or onto one that was too cold and hard for any adhesion at all. Fifteen minutes at refrigerator temperature is the target — firm to the touch but not rigid.
Variations Worth Making
Pretzel base instead of graham. Replace the graham crumbs with 1 cup of crushed salted pretzels and reduce the fine salt to ½ teaspoon. Pretzels are denser and less absorbent than graham crackers, so the base sets firmer with more snap. This is the version I make most.
Espresso in the chocolate. Whisk 1 teaspoon of instant espresso powder into the melted chocolate. Coffee compounds amplify perceived chocolate intensity without contributing recognizable coffee flavor at this quantity — the bars taste more like chocolate, not like mocha.
Almond butter and dark chocolate. Swap the peanut butter for conventional almond butter and use 70% chocolate. Almond butter is thinner and less sweet, so increase the powdered sugar to 1¾ cups. The result is less confectionery and more grown-up.
Add a middle layer of flaky salt and chopped peanuts. Scatter ½ cup roughly chopped roasted salted peanuts over the base before the chocolate goes on. The textural interruption between two soft layers is worth more than it sounds, and it stops the bars reading as uniformly dense.
Gluten-free. Gluten-free graham-style crumbs substitute directly with no adjustment. Almond flour does not work — it lacks the starch that firms the base and absorbs oil differently.
How to Serve Them
Serve them at 65 to 68°F, not straight from the refrigerator. Take the cut bars out 12 to 15 minutes ahead. Cocoa butter’s melting point sits near 93°F, so chocolate at 38°F is well below the temperature at which its aroma compounds volatilize — a bar eaten cold tastes noticeably flatter than the same bar at room temperature, and the peanut butter layer is firmer than it should be.
Cut them small. A 1½-inch square is right for something this rich, and sixteen bars from an 8-inch pan is deliberate — quartering the pan produces something most people cannot finish. They are at their best next to something bitter and hot, since black coffee or unsweetened tea cuts the sweetness in a way milk does not. For a plated dessert, set a bar on a smear of crème fraîche with a few raspberries; the acidity does the same work as the coffee.
Storage
Keep them in an airtight container in the refrigerator for up to 10 days, with parchment between layers so the chocolate does not scuff.
What changes is the base, not the chocolate. Over about a week the graham crumbs absorb moisture from the peanut butter and lose their sandiness, and the layer turns uniformly fudgy — still good, arguably better on day two than day one, but past a week the contrast is gone. Room temperature storage works for a day at 68°F or below and no further; the coconut oil softens above about 76°F and a warm kitchen leaves the top tacky.
They freeze genuinely well for 3 months, wrapped individually in parchment and bagged. Thaw them in the refrigerator overnight rather than on the counter — condensation forming on cold chocolate causes sugar bloom, a gritty white film that changes the texture of the surface permanently.
Approximate Nutrition Per Bar
| Calories | Protein | Carbs | Fat | Fiber |
|---|---|---|---|---|
| 304 kcal | 6 g | 28 g | 21 g | 2 g |
All values are approximate estimates provided for informational purposes only, based on 16 bars from an 8-inch pan. Actual figures vary with peanut butter brand, chocolate percentage, and bar size.
Closing Note
These earn their place because the failure modes are entirely preventable once you know them: coconut oil in the chocolate, conventional peanut butter in the base, and a knife through the top layer at twenty minutes. Nothing else about them is difficult.
Make a pan and watch the chocolate go matte. That is the only cue you need to learn.