


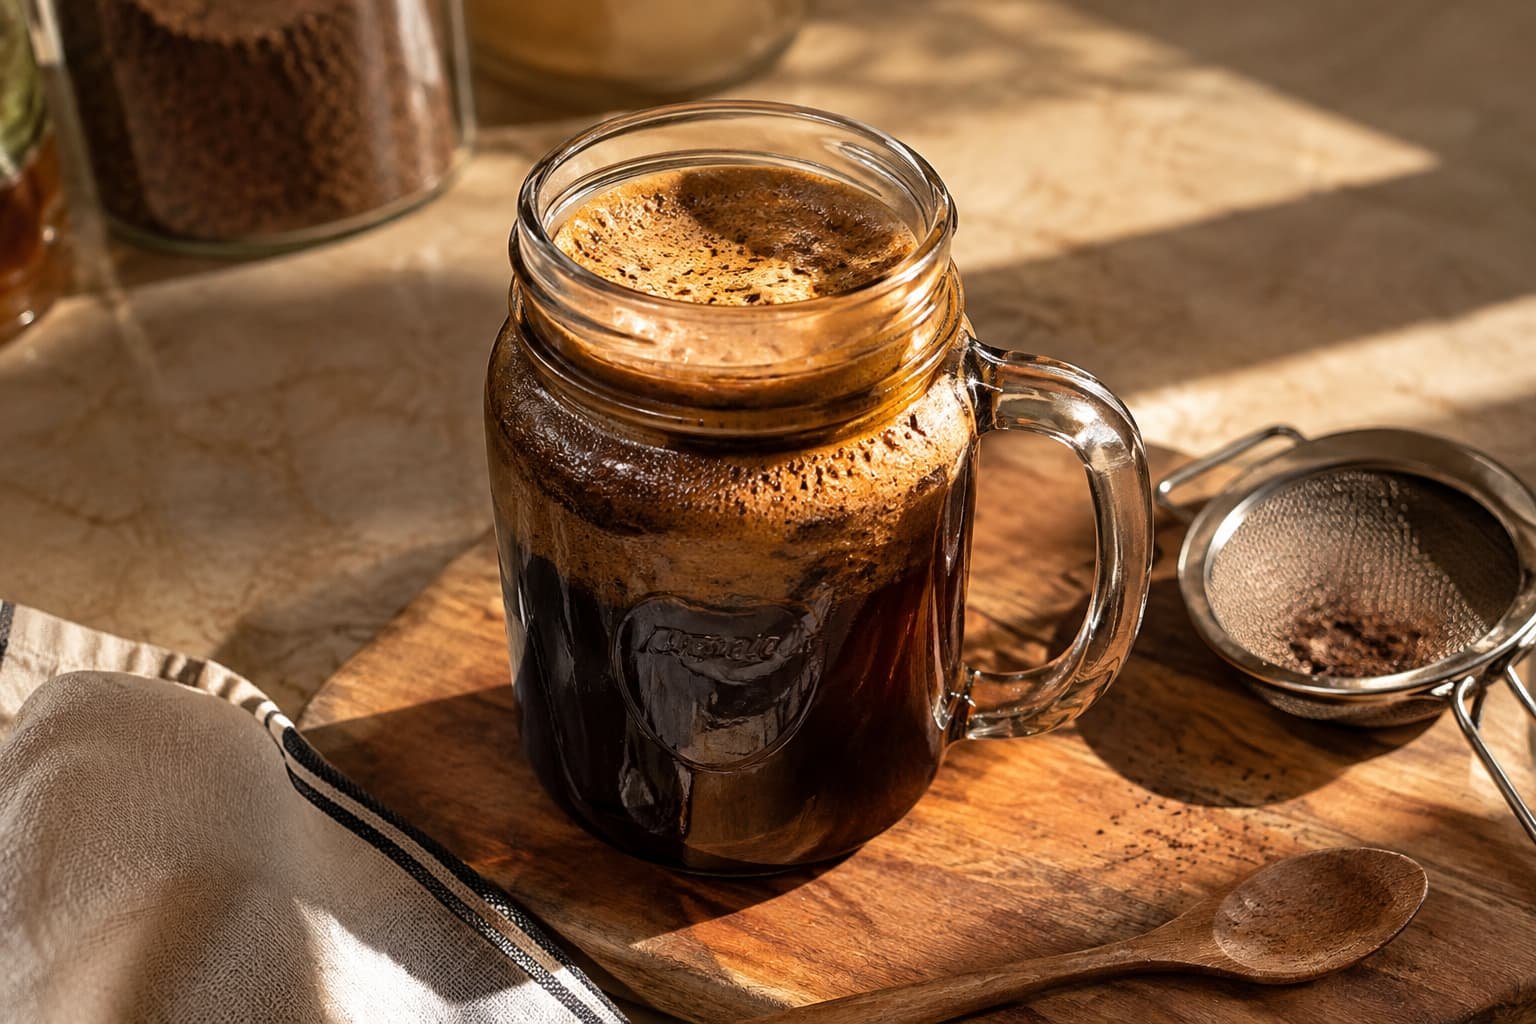
Pour water just off the boil onto coffee ground twenty seconds ago and the surface swells into a domed, foaming crust that smells of cocoa and citrus peel. That dome is carbon dioxide escaping the grounds, and it is the most honest freshness test in coffee — beans roasted three weeks ago barely lift, while beans roasted last Friday will threaten the rim of the jar.
Nothing in this method costs more than a mason jar and a fine-mesh sieve. What produces a genuinely better cup at home is not equipment; it is four numbers — the ratio of coffee to water, the temperature of that water, the coarseness of the grind, and the time the two spend together. Every expensive brewer on the market is just a device for controlling those four things, and you can control all of them by hand.
What follows is a full-immersion brewing method that yields a cup with body closer to a French press than a paper-filter drip: heavier in the mouth, rounder, with the oils intact rather than stripped out by paper.
| Prep Time | Brew Time | Total Time | Makes |
|---|---|---|---|
| 3 minutes | 4 minutes | 7 minutes | 2 cups |
Why Full Immersion Is the Right Method Here
Brewing coffee is a solvent extraction. Hot water dissolves roughly 28 percent of a coffee bean’s mass in total, but only the first 18 to 22 percent tastes good. Pull less than 18 percent and the cup reads sour and thin, because the acids dissolve first and the sugars have not yet followed. Push past 22 percent and you begin extracting the bitter compounds that sit deepest in the cell structure.
Full immersion — grounds sitting in water for a fixed time rather than water passing through them — is the most forgiving way to land in that window without equipment. In a pour-over, contact time depends on how fast the water drains through the bed, which depends on grind consistency, which is exactly what a home grinder does badly. In immersion, contact time is a number you set and a clock enforces.
The second advantage is body. A metal sieve passes the coffee’s soluble oils and finest particles into the cup; paper traps most of them. Neither is objectively correct, but the sieve gives a heavier, more textured cup, and that texture forgives a great deal — including grounds that were never evenly ground.
What You Need
- 30 grams whole-bean coffee (about 5 level tablespoons ground) — Look for a roast date on the bag, not a “best by” date. A bag with only a best-by date is telling you the roaster does not want you to know the roast date. Coffee is at its best from 4 days to about 3 weeks after roasting; before day 4 it is still degassing so heavily that the brew tastes muted, and past a month the aromatics have faded past recovery.
- 480 grams water (about 2 cups) — This is a 1:16 ratio by weight, which is where I would start every new bag. If you have no scale, use 2 level tablespoons of ground coffee per 6 ounces of water. A scale is the one purchase worth making, and a basic kitchen scale costs less than two bags of good beans.
- Filtered water, not distilled. If your tap water tastes faintly of chlorine, your coffee will taste faintly of chlorine — water is 98.5 percent of the cup. But distilled water is the opposite mistake: extraction depends on dissolved minerals, particularly magnesium and calcium, to bind flavor compounds. Coffee brewed with distilled water tastes hollow and flat. A basic carbon filter pitcher is the right answer.
- A quart mason jar or any heatproof vessel, a fine-mesh sieve, and a spoon.
- A grinder. A burr grinder produces uniform particles and is worth every dollar. A blade grinder is acceptable, and I would rather you use a blade grinder on fresh beans than buy pre-ground — pre-ground coffee loses the majority of its volatile aromatics within about fifteen minutes of grinding, and no brewing technique recovers them.
How to Brew It
- Bring the water to a full boil, then take it off the heat and wait 45 seconds. Water leaves a rolling boil at 212°F and drops to roughly 200°F in that window, which sits in the correct 195 to 205°F range. Boiling water poured directly onto grounds scalds them and extracts bitter compounds within the first ten seconds — this is the most common single error in home brewing and it needs no equipment to fix, only patience.
- Grind the coffee to a medium-coarse texture — the particles should look like coarse sea salt and feel gritty rather than powdery between your fingers. If you are using a blade grinder, pulse in 2-second bursts and shake the grinder between pulses, about eight pulses total. Continuous grinding pulverizes the bottom layer while the top stays whole.
- Add the grounds to the jar and pour 60 grams of water over them — twice the weight of the coffee. Stir once to wet every particle, then wait 45 seconds. This is the bloom, and the dome that rises is the CO2 leaving. Fresh coffee will swell and crackle audibly; if the surface barely moves, your beans are older than the bag suggests.
- Pour in the remaining 420 grams of water in a steady stream, aiming for the center so the force of the water lifts the bed. Start your timer now.
- At the 30-second mark, stir once — briskly, four or five rotations. This is the only stir. Grounds that float on the surface are not extracting, and a single stir at 30 seconds submerges them while the water is still hot enough to matter. Stirring later in the brew agitates the fines and pushes you toward over-extraction.
- Let it sit undisturbed until 4 minutes total. A crust of grounds will form on the surface and hold there. Leave it.
- Break the crust with the spoon and skim off the foam and floating grounds. That top layer holds the coarsest particles and a concentrated share of the bitter compounds; taking thirty seconds to remove it noticeably cleans up the cup.
- Pour through the fine-mesh sieve into your mug or a second vessel, and stop pouring while there is still a shallow layer of liquid over the grounds. The last inch is the muddiest and the most over-extracted portion of the brew. Leaving roughly two tablespoons behind costs you almost nothing in volume and improves the cup meaningfully.
- Drink it within 20 minutes. Coffee’s aromatic compounds are volatile — they are leaving from the moment the brew is finished, and the cup at minute 30 is measurably duller than the cup at minute 3.
The Two Variables That Decide the Cup
Everything above is fixed procedure. These two are the ones you adjust, and learning to read them is what turns a recipe into a skill.
Water temperature governs how fast the extraction proceeds. Below 195°F, the sugars and heavier compounds do not dissolve efficiently and the cup arrives sour and thin no matter how long you brew. Above 205°F you begin pulling bitter compounds immediately. If you own no thermometer, the 45-second rule handles it — but altitude changes the boiling point, and above about 4,000 feet water boils near 204°F, so cut the wait to 20 seconds.
Grind size governs extraction through surface area, and it is the dial you turn to fix a bad cup. Diagnose by taste, not by guessing:
- Sour, sharp, thin, finishes quickly — under-extracted. Grind finer, or extend the brew to 5 minutes. Adjust one, not both.
- Bitter, drying, harsh at the back of the tongue — over-extracted. Grind coarser, or shorten the brew to 3 minutes.
- Weak but not sour — this is a ratio problem, not an extraction problem. Use more coffee, not a finer grind. The distinction matters: strength is how much coffee is dissolved in the water, extraction is how much of the bean got dissolved, and confusing the two is why people grind finer and end up with a cup that is both bitter and weak.
Change one variable per brew and write down what you did. Three mornings of that gets you a repeatable cup for a specific bag of beans, and every bag wants something slightly different.
Practical Notes
Preheat the jar and the mug with hot tap water while the kettle heats — a room-temperature glass jar pulls 8 to 10°F out of your brew water in the first thirty seconds, enough to drop you below the extraction window. And grind immediately before brewing, never the night before: it is the largest quality gain available to a home brewer and it costs forty seconds.
Weigh the water rather than measuring volume if you have a scale. One gram of water is one milliliter, so the scale does both jobs, and volume measurements of coffee grounds vary by up to 20 percent depending on grind size and how the spoon was filled.
Rinse the sieve immediately after use with hot water and no soap — coffee oils oxidize into a rancid film within a day or two, and that film carries a stale, slightly fishy note into the next brew. And do not chase the last drops by pressing the grounds with a spoon; pressure forces the fines and the bitter liquid through.
Common Mistakes and How to Avoid Them
Pouring boiling water directly onto the grounds. Covered above and worth restating: it is the most frequent cause of harsh home coffee, and the fix is a 45-second pause.
Using pre-ground coffee and blaming the method. A bag of pre-ground coffee opened two weeks ago has lost most of what made it worth buying. No ratio, temperature, or timing recovers it.
Storing beans in the refrigerator. Refrigerators cycle through humid and dry phases, and coffee is hygroscopic — it absorbs moisture and odors readily. Beans in the fridge pick up whatever else is in there and go stale faster than beans on the counter.
Guessing the ratio by eye. Coffee ground coarse occupies noticeably more volume than the same weight ground fine, so a scoop is not a fixed dose. This is why two people following the same tablespoon instruction get different cups.
Letting it sit on a warmer or reheating it. Held above about 175°F, coffee’s chlorogenic acids continue breaking down into bitter lactones — which is precisely why diner coffee that has sat on a burner tastes the way it does.
Brewing a full 4 minutes with a blade grinder. Blade grinders produce a wide range of particle sizes, and the fine dust over-extracts long before the coarse chunks are done. Cut the brew to 3 minutes 30 seconds to protect against the fines.
Variations Worth Making
Overnight cold brew, same jar. Use the same 30 grams of coffee ground coarser, 480 grams of room-temperature water, no bloom, and leave it 16 hours on the counter. Cold water extracts far fewer of the acids, which is why cold brew tastes rounder and sweeter — it is a different extraction profile, not simply cold coffee. Strain through the same sieve lined with a paper towel.
A concentrate for milk drinks. Brew at 1:8 — 60 grams of coffee to 480 grams of water — and hold the brew to 4 minutes exactly. The result is intense enough to stand up to milk without the milk flattening it. This is the closest you get to a latte without a machine, and it is genuinely satisfying rather than a compromise.
Cardamom and cinnamon. Add 3 lightly crushed green cardamom pods and a 1-inch piece of cinnamon bark to the grounds before the bloom. The spices infuse during the same four minutes. Crush the cardamom rather than grinding it — ground cardamom passes through the sieve and turns the cup silty.
A lighter body. Line the sieve with a paper coffee filter or a paper towel for the final pour. You lose the oils and gain clarity — the cup reads cleaner and more tea-like, and delicate light-roast beans from Ethiopia or Kenya show their florals better this way.
How to Serve It
Serve it in a preheated ceramic cup. A cold cup drops the temperature roughly 15°F on contact, and coffee shows its best flavor between about 130 and 160°F — below 120°F the perceived bitterness climbs sharply as the aromatics fade.
Taste it black first, every time, even if you drink it with milk. Not purism — black is where you read whether the extraction was right, and that reading is what lets you adjust tomorrow.
If it needs sweetening, a pinch of salt is worth trying before sugar. Sodium suppresses bitterness perception directly, and a very small pinch in a two-cup brew rounds off harshness without adding sweetness. This works on any over-extracted cup you have already brewed and cannot fix.
Alongside food, the heavier body of this method holds up to butter and sugar well — it sits comfortably next to something rich like a croissant or a slice of buttered toast without being overwhelmed.
Storing Your Beans
Store whole beans in an opaque, airtight container at room temperature, away from the stove. Oxygen, light, heat, and moisture stale coffee in roughly that order of damage, and the foil bag with a one-way valve most roasters use is already good storage if you roll it down tightly and clip it. Buy what you will use in three weeks — a one-pound bag at 30 grams per brew is about fifteen brews.
Freezing works, but only under one condition: the beans must be divided into single-brew portions in airtight bags and taken out no more than once. Every time frozen beans return to room temperature they condense moisture on their surface, and repeated cycles do more damage than sitting on the counter would have. Frozen properly, whole beans hold their character for about three months. Grind them straight from frozen.
Never store beans in the refrigerator, and never store ground coffee for more than a few days regardless of container.
Approximate Nutrition Per Serving
| Calories | Protein | Carbs | Fat | Fiber |
|---|---|---|---|---|
| 3 kcal | 0.3 g | 0 g | 0 g | 0 g |
All values are approximate estimates provided for informational purposes only, for one 8-ounce cup brewed black. Milk, cream, and sweeteners change these figures substantially.
Closing Note
The gap between mediocre home coffee and a genuinely good cup is not equipment. It is a 45-second pause off the boil, beans with a roast date on them, and the willingness to change one variable at a time until the cup is right.
Brew it once tomorrow morning with a clock and a note. The second cup will already be better than the first.